 |
This
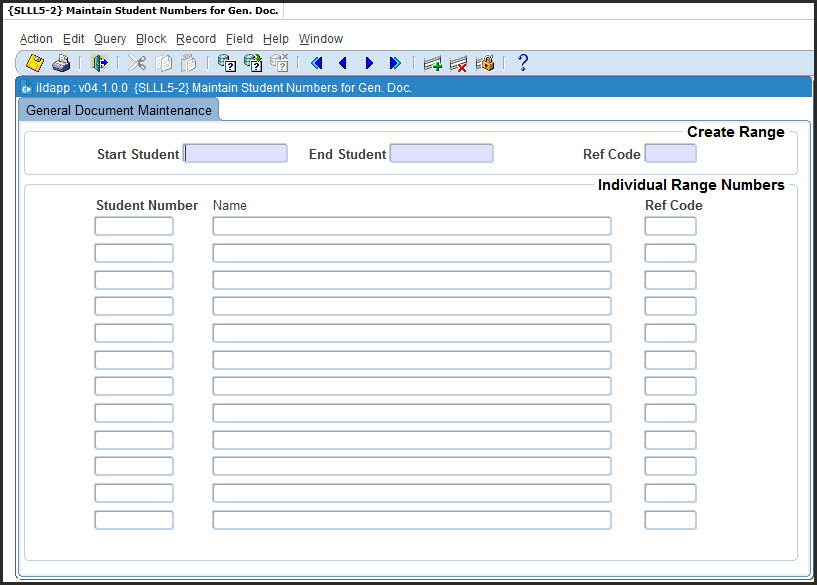
option is used to specify student numbers to process when generating
documents and has two Blocks.
Block
1 is used to select student numbers that fall within a specified range.
Block 2 is used to process a list of students. The list can be imported
from a csv file.
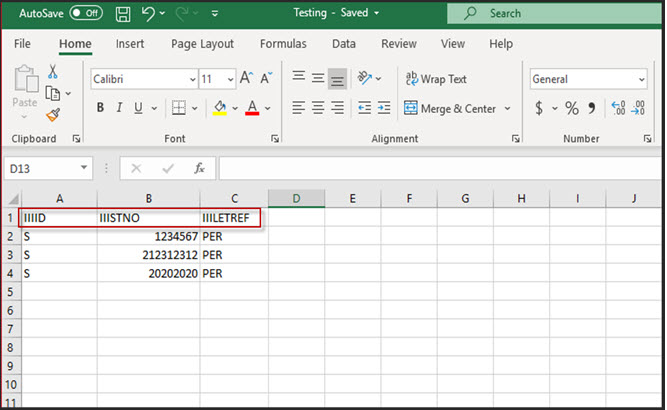
Note: When Exporting and Importing files the
latest version of Excel must be used.
| Field | Type & Length |
Description |
|---|---|---|
| Start Student Number | N9 | Start student number for generation. |
| End Student Number | N9 | End student number for generation. |
| Reference Code | A4 | This code will identify the group of students that will receive a particular letter. |
| Processing Rules |
|
|---|---|
| When start and end student number are entered, the user
executes <NEXT BLOCK>. All existing students with
numbers within this range will be displayed. The user can delete the ones that are not applicable and <COMMIT> the student numbers of students that should receive the documentation. |
| Field | Type & Length |
Description |
|---|---|---|
| Student Number | N9 | Enter student number to be used in generation of the
letter. The student name will be displayed. |
| Reference Code | A4 | This code will identify the group of students that will receive a particular letter. |
|
|
|
Processing |
a) Create a file for upload and save the completed file on local pc as a .csv file.
c) Select the file using Browse from local pc, which will display in File(s) area. d) Commit the changes on the screen using the Save button.
|
||
|
Processing Rules for Export |
a) Query the Ref Code. If you do not use the ref code it will give you all the information in the database. b) Execute the query c) Right click and select Export d)
User
should confirm the file name to be exported
e)
User selects Save File(s) to
place the files on the pc in a .csv format.
|
| Date | System Version | By Whom | Job | Description |
|---|---|---|---|---|
| 08-Apr-2007 | v01.0.0.0 | Bea Swart | t133415 | New manual format. |
| 29-Jun-2007 | v01.0.0.0 | Magda van der Westhuizen | t133415 | Edit manual |
| 12-Aug-2020 |
v04.1.0.0 |
Sizeka Nyandeni |
T244727 |
Adding Export and Import
function |