 |
Current Situation
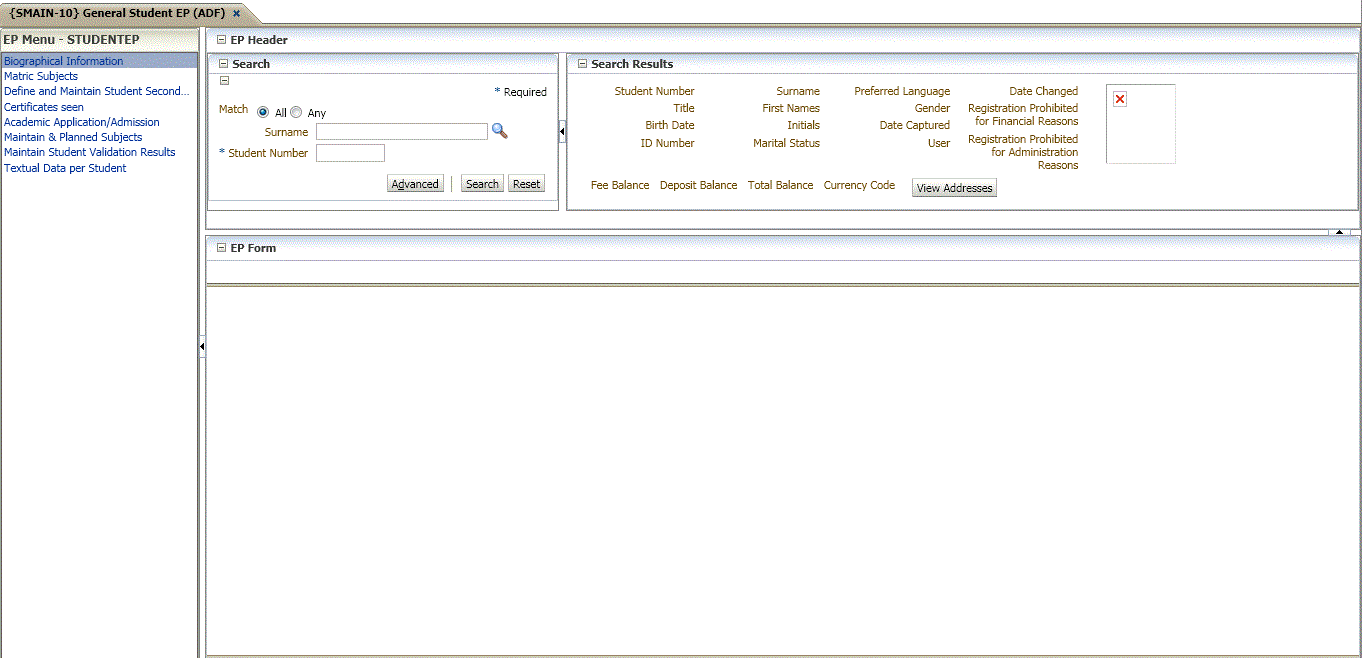
A default entry point caters for holistic data management with a 360° view of the student's life cycle or creditor or debitor. The institution can create "environments", such as the academic structure, registration of a student, allocation of financial aid to students etc, within this frame and link options or processes to it. An institution has the ability to create processes that are specific to its business areas.
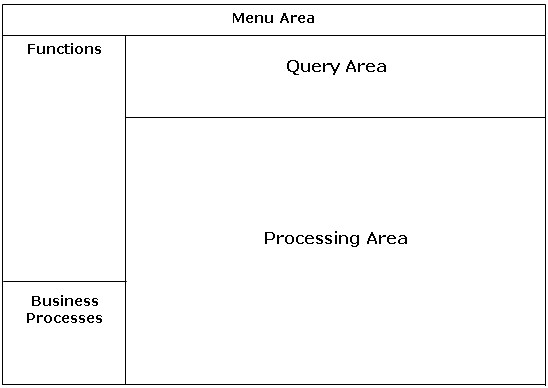
Layout of General Entry Point:
|
General application of
each area:
Layout of Entry Point on System
|
|
|
|
|
|
|
| Step 1: Planning of an EP which should be done by the Client. |
Step 2: Creating an EP on the ITS system. |
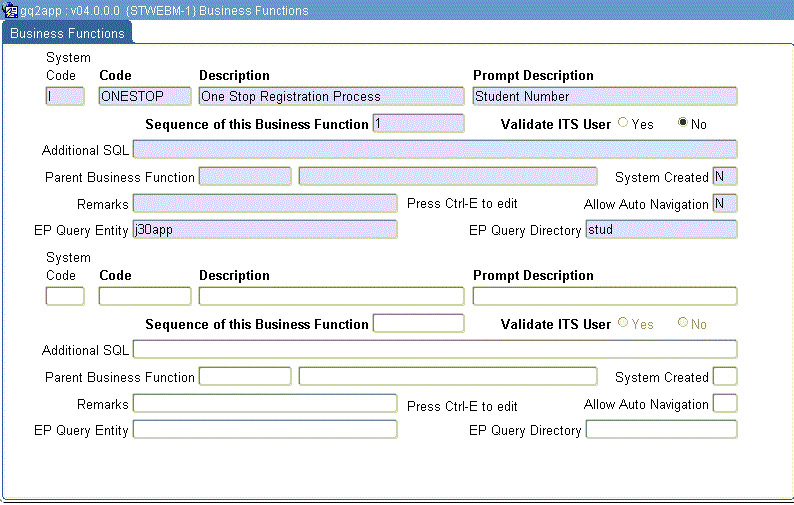
| Decide if an EP is needed for a process E.g registration, etc and then decide on a Business Function name for each EP | Create the
Business Function name for each EP and link the query entity on {STWEBM-1} or {PWEBM-1} Optional: change the default function frame name. |
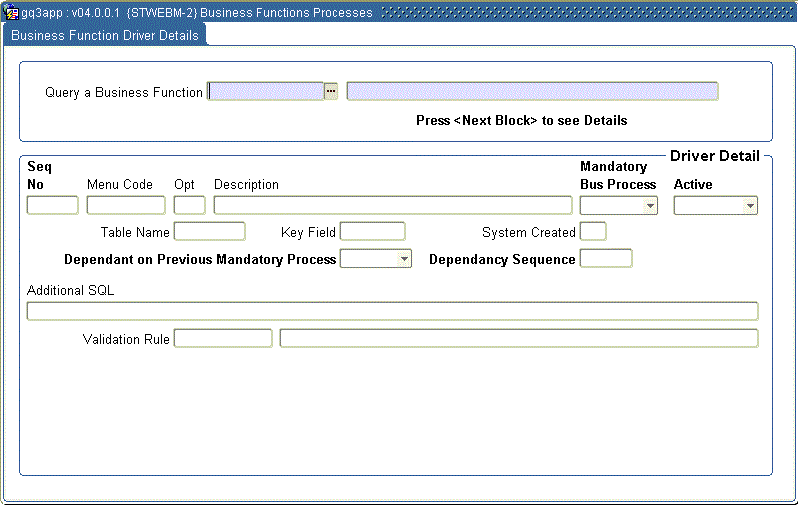
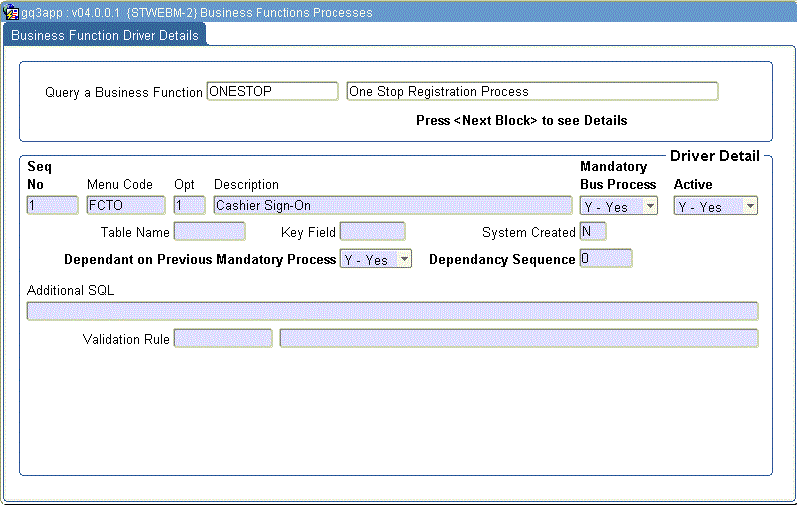
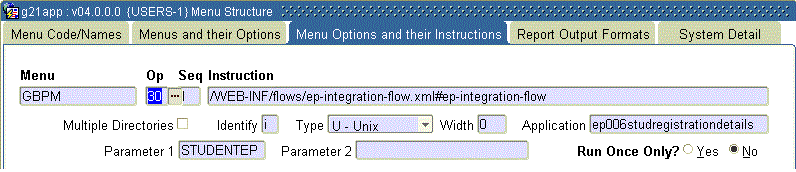
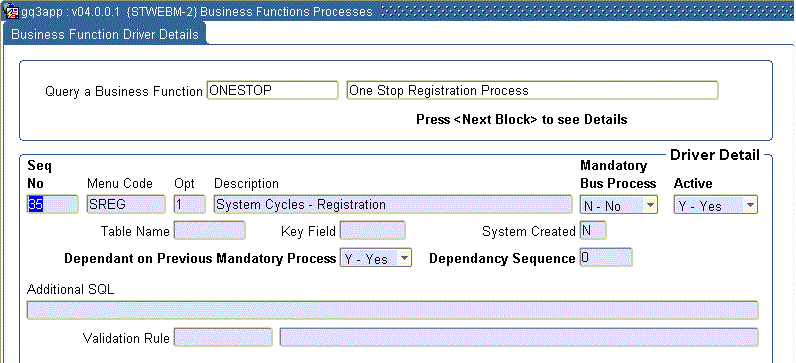
| Decide which programmes must be linked to each EP | Link the menu(s) and option(s) for the EP on {STWEBM-2}, at Driver Detail or {PWEBM-2}, at Driver Detail |
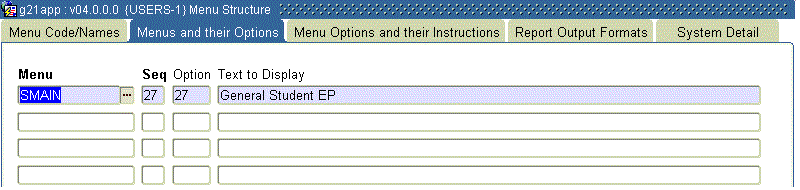
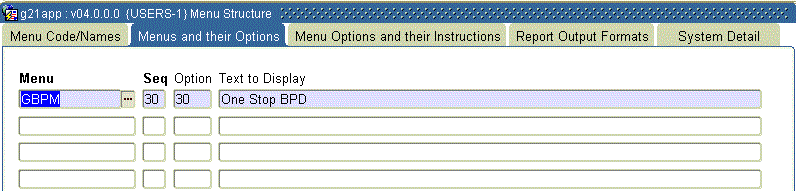
| Decide on the menu and option for each EP | Create the menu(s) and
option(s) for the EP on {USERS-1},
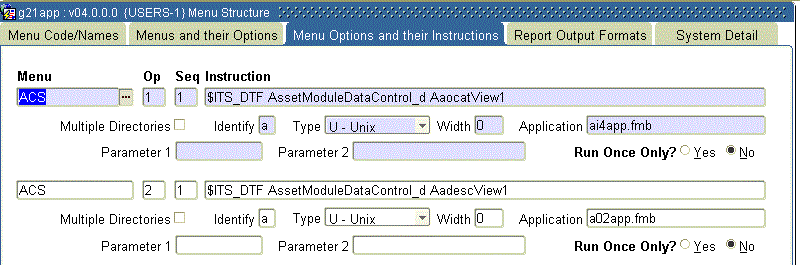
TAB - Menu and their Options Link menu and option to program Instructions on {USERS-1}, TAB - Menu and their Instructions |
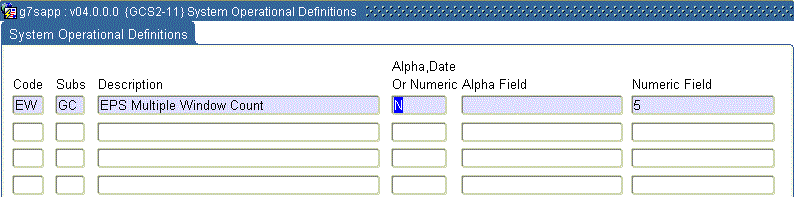
| Decide on the number of options which can be opened simultaneously by a user | Set up the number of simultaneously open options on {GCS2-11} |
| See Demonstration #1 for detail steps | See Demonstration #2 for detail steps. |
| Purpose |
To plan your entry point |
|---|---|
| Need | Entry Point for the registration process |
| Name/ Business Function | ONESTOP |
| Programmes to be linked | Cashier Sign - on Cashier Sign - Off Enter Receipts Transactions Qualification/Subject Registration Register Additional Subjects Print Student Enrolment Student Account Query Receipts Payment Analysis Receipt Transaction List System Cycles- Registration Biographical Information Cancel a subject Cancel Enrolment |
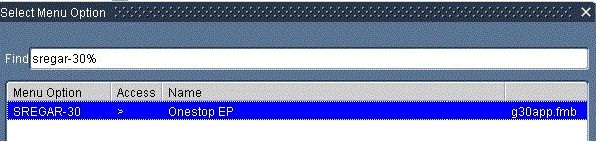
| Menu and Option | {SREGAR-30} |
| Options simultaneously open | Five |
| Function Frame Name | Available Options |
|
|
|
|
|
|
|
|
|
|
| Step 1: Planning of BPD which should be done by the client |
Step 2: Creating an BPD on the ITS system. |
| Decide if
a BPD is needed for a process E.g registration, etc |
Create the
Business Function name for each BPD and link
the query entity for each BP on {STWEBM-1} |
| Decide which programmes must be linked to each BPD | Link the menu(s) and option(s) and business rules and validation rules to the Business Process function {STWEBM-2b2} |
| The same Business Function name as for Entry Point must be used with a "D" at the end of the name and another function name to link the menu and options | Create the menu(s) and option(s) for the BPD on {USERS-1b2} |
| Decide on the menu and option for each BPD (if applicable) | Link menu and option to program Instructions on {USERS-1}, TAB |
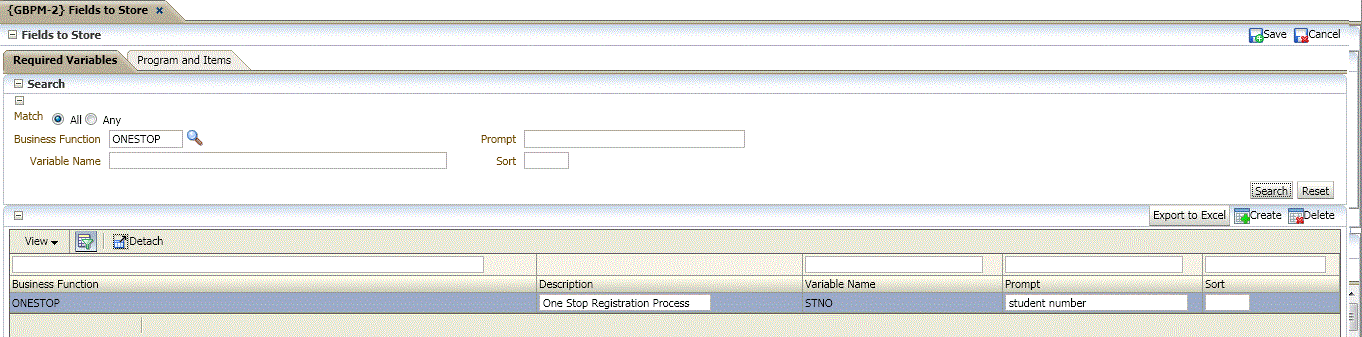
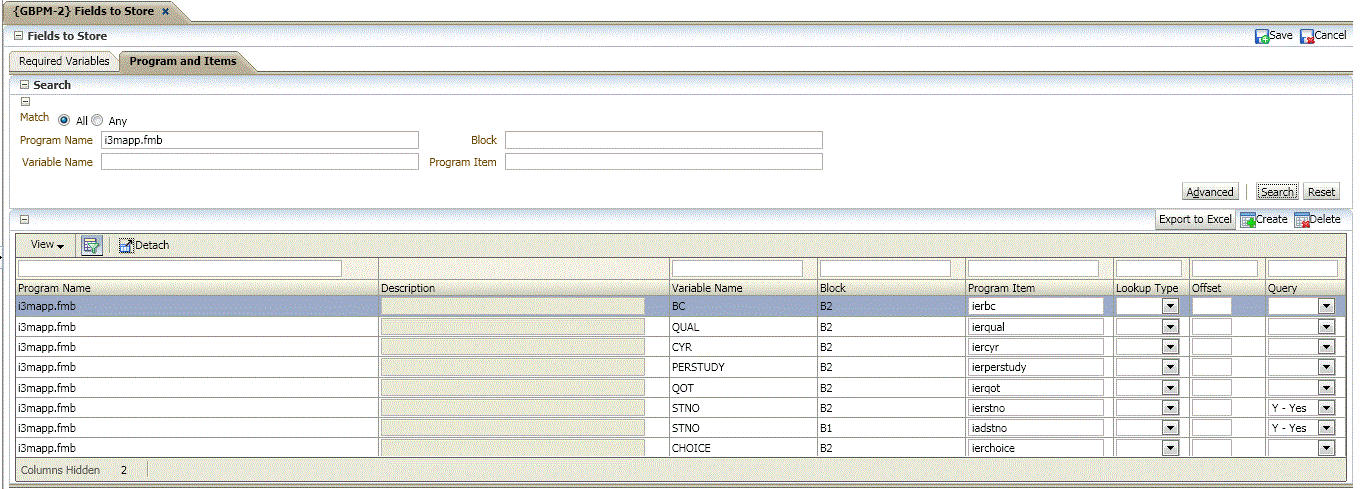
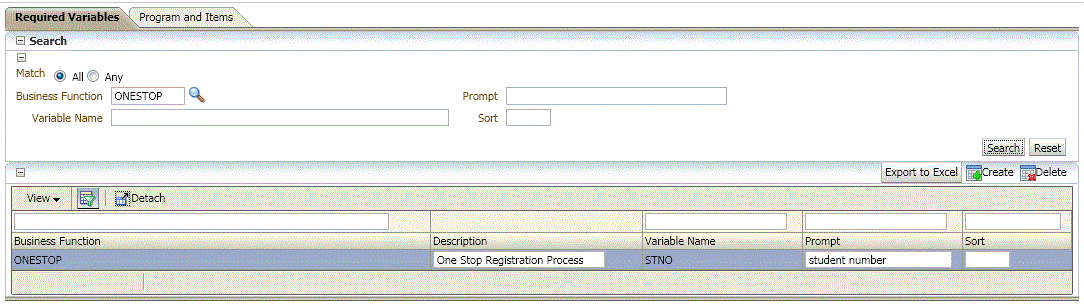
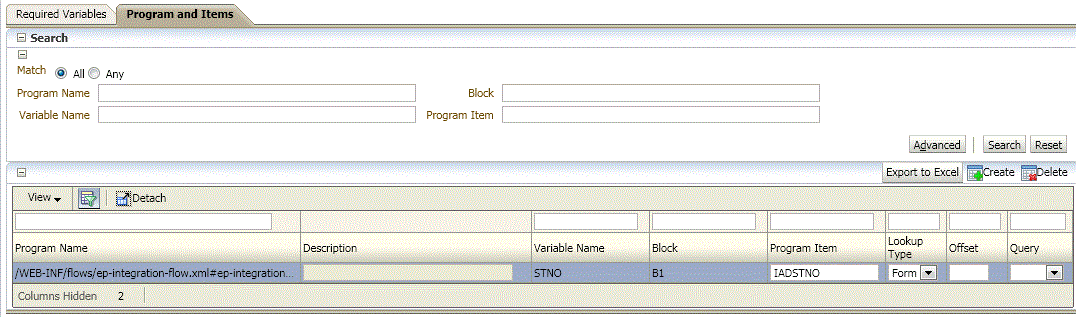
| Decide on the fields that must be linked to the BPD | Link fields to business process {GBPM-2} |
| The rules of the BP must be set up e.g sequence, mandatory business process, if dependant on another sequence, validation rules. | |
| See Demonstration #3 for detail steps | See Demonstration #4 for detail steps. |
| Purpose |
To plan your Business Process Drivers |
|---|---|
| Need | Business Process Driver for the registration process |
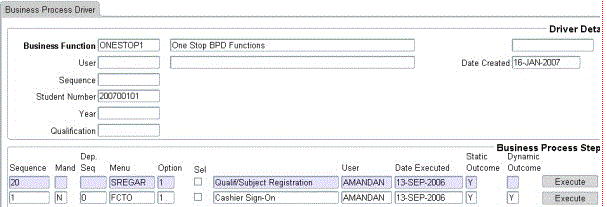
| Name/ Business Function | ONESTOP AND ONESTOP1 |
| Programmes to be linked | ONESTOPD You link the Business Process Driver option e.g. {GPBM-3-} ONESTOP1 Cashier Sign - On Cashier Sign - Off Enter Receipts Transactions Qualification/Subject Registration Register Additional Subjects |
| Menu and Option | {GBPM-30} |
|
|
|
|
|
|
|
|
|
|
| Processing Rules |
|
|---|---|
| No special processing rules |
| Date | System Version | By Whom | Job | Description |
|---|---|---|---|---|
| 15-Jan-2007 | v01.0.0.0 | Charlene van der Schyff | t137175 | New manual format. |
| 06-May-2008 | v01.0.0.1 | Amanda Nell | t149914 | Added more information regarding Business Process Driver |
| 07-Jan-2011 | v01.0.0.2 | Goodman Kabini | t171521 | Add more description om Query area paragraph under General application of each area block. |
| 10-Apr-2015 | v04.0.0.0 | Magda van der Westhuizen | t205922 | Convert to INT4.0. |
| 03-Feb-2016 | v04.0.0.0 | Magda van der Westhuizen | t198986 | ATOV 198986 |